Adding Content
Once you have created your scene, you can start customizing it by adding content. Spoke and Hubs support a wide variety of media. Note that to publish to Hubs, Spoke projects have a size limit of 128MB.
3D Models
Spoke allows you to search 3D content from Sketchfab. You can find collections in the assets media browser.
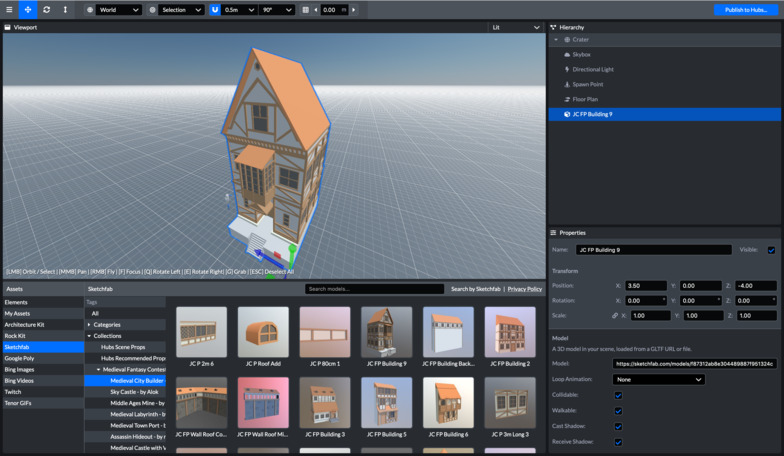
If you have existing .glb or .glTF models, you can upload those to your asset library as well.
Uploading Content
You can upload your own existing assets to use in Spoke. To upload content:
- Select the 'My Assets' tab in the Assets panel of the Spoke editor
- Click the 'Upload' button in the 'My Assets' panel and choose the file to upload
You can also drag + drop content into the editor window to upload it to Spoke. Scenes have a size of 128MB, and files used in the scene must be below that size.
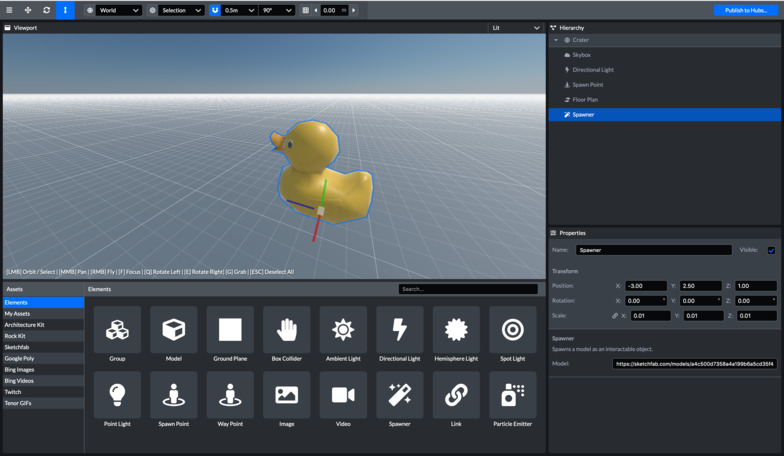
3D Model Spawners
If you want to create a room that has a specific 3D object that people can make copies of, you can create a ‘Spawner’ element. This can be helpful for making it easy to have a scene that can allow multiple people to quickly get their own copies of the same object. To do this, you will want to copy the URL of the model that you want, create a ‘Spawner’ element from the Asset panel > Elements tab, and paste the URL into the properties box.
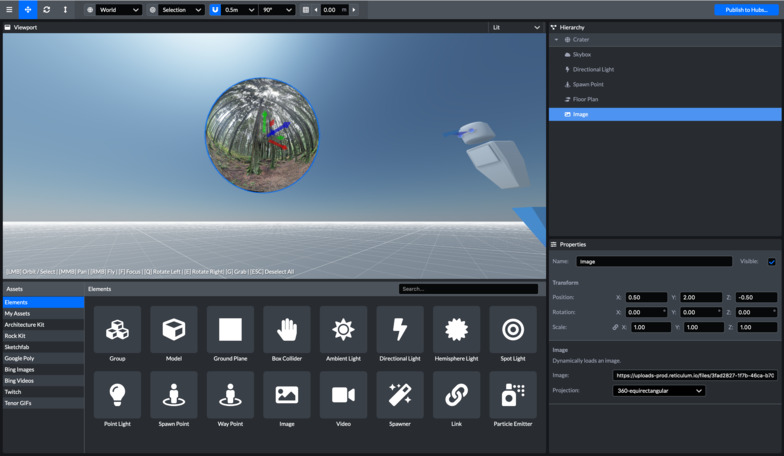
Images
Images can be added to Spoke with a 2D projection or a 360 degree equirectangular projection (a format that could be used as a skybox or other type of scene background). You can upload images or gifs from your own computer or use the built-in search tool from within Spoke to find media online.
Video
You can link to online videos in Spoke to create a permanent player for video content. Spoke attempts to automatically play any type of streaming video content or live stream. YouTube and Twitch URLs usually work well for streaming if you want to have a permanent link to an ongoing feed in your scene. Like images, videos can be projected in either 2D, or a 360 equirectangular projection.
It is worth noting that the current behavior for videos in Spoke can be configured to automatically play and loop, but you cannot currently change the video that is linked after the scene is published to Hubs. If you want to temporarily add a video that can be removed, you may want to consider adding it to Hubs and pinning it to your room instead.
If you want to use additional types of feeds, such as a screen or window share from your desktop or your webcam, you can add these after you create a Hubs room with your scene. Currently, screen and camera sharing cannot be instantiated inside of Spoke.
Audio
You can add links to .mp3 files to add audio to a Hubs scene. Currently, however, there are no controls on audio clips added using Spoke.
We recommend uploading audio files to Hubs directly, so you can access the volume controls in case people have trouble hearing with the audio playing at the same time.
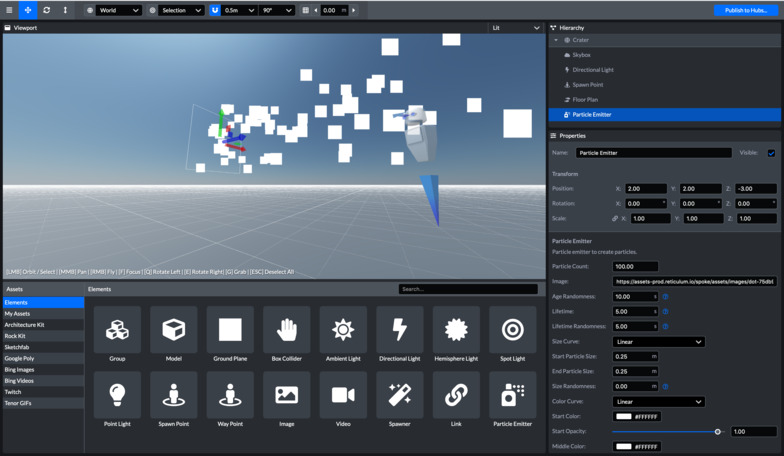
Particle Emitter
The particle emitter is a Spoke object that spawns moving particles.
Links
You can include links in your scene to point to other Hubs rooms or to different places on the web. To create a link element in Spoke, under Elements, select the 'Link' element. When your link element is selected, paste your URL into the properties panel. When your scene is published and used to create a room in Hubs, the URL will be resolved to its file type and displayed according to the content type. If you use a URL to a general website, Hubs will attempt to take a screen shot and display that content where the link element is placed. If the url cannot be resolved, it will display a broken media image instead.
Media Frames
You can use the Media Frame element to designate areas you would like media objects to snap to in-world. Media Frames can accept both 2D media and 3D models.

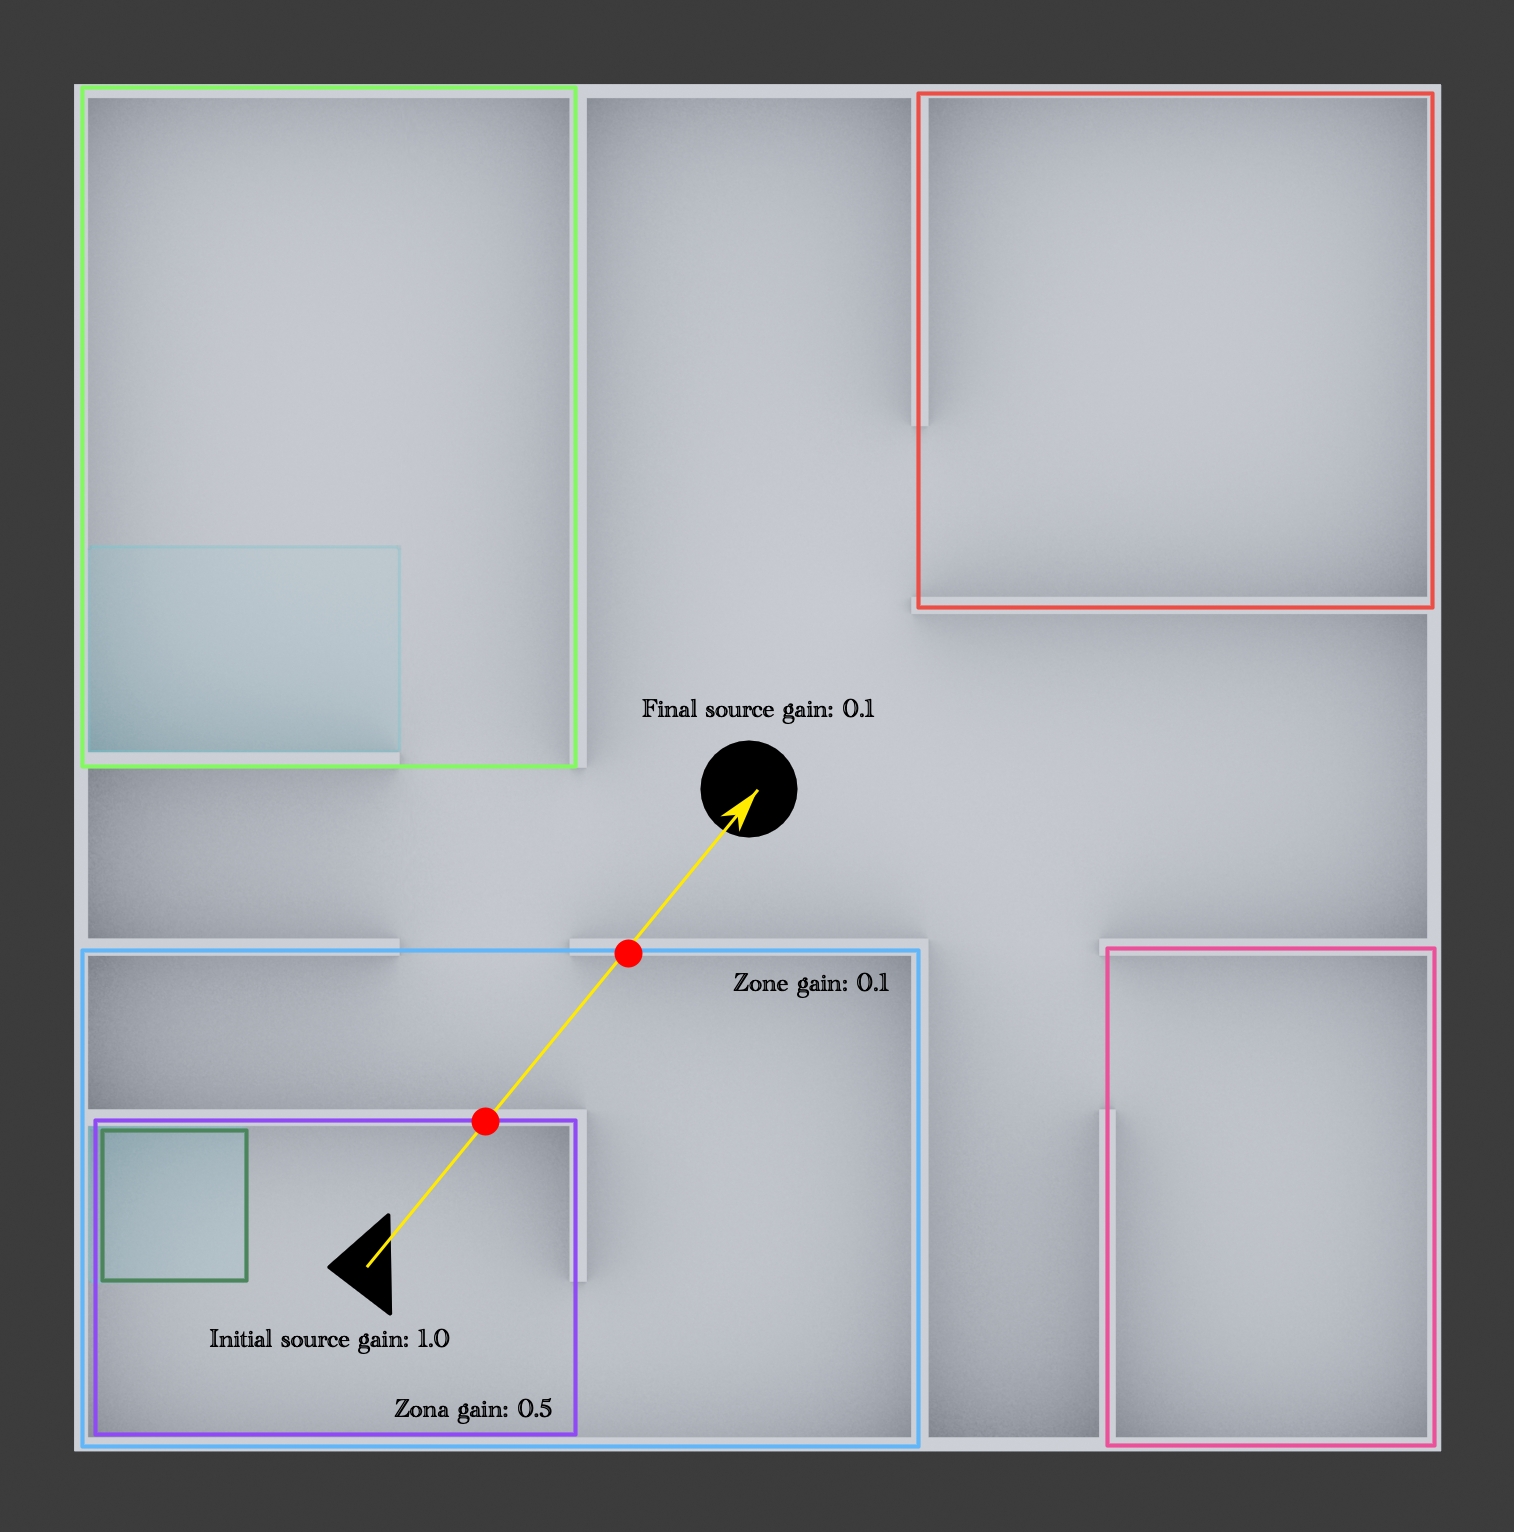
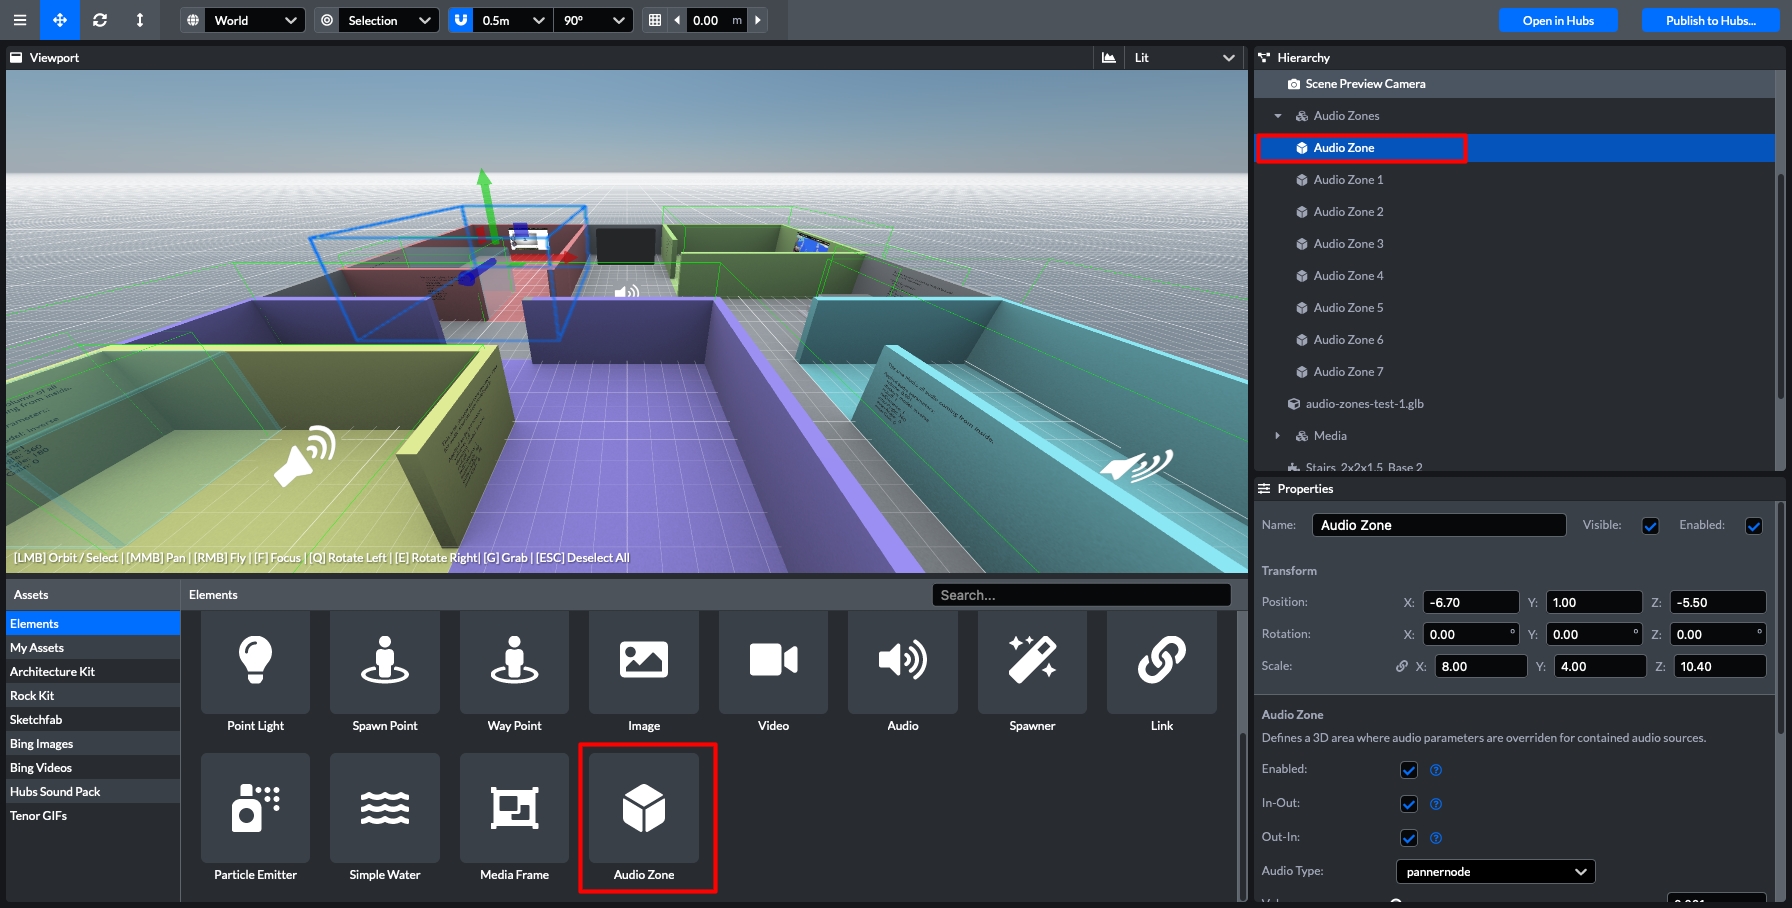
Audio Zones
Audio Zones are 3D volumes that modify the audio properties of audio sources (avatars, videos, audios, audio targets, etc) based on the source's and listener's positions with respect to the audio zone. One obvious application would be to dim audio sources' volumes based on 3D areas like rooms to mimic the real world behavior.
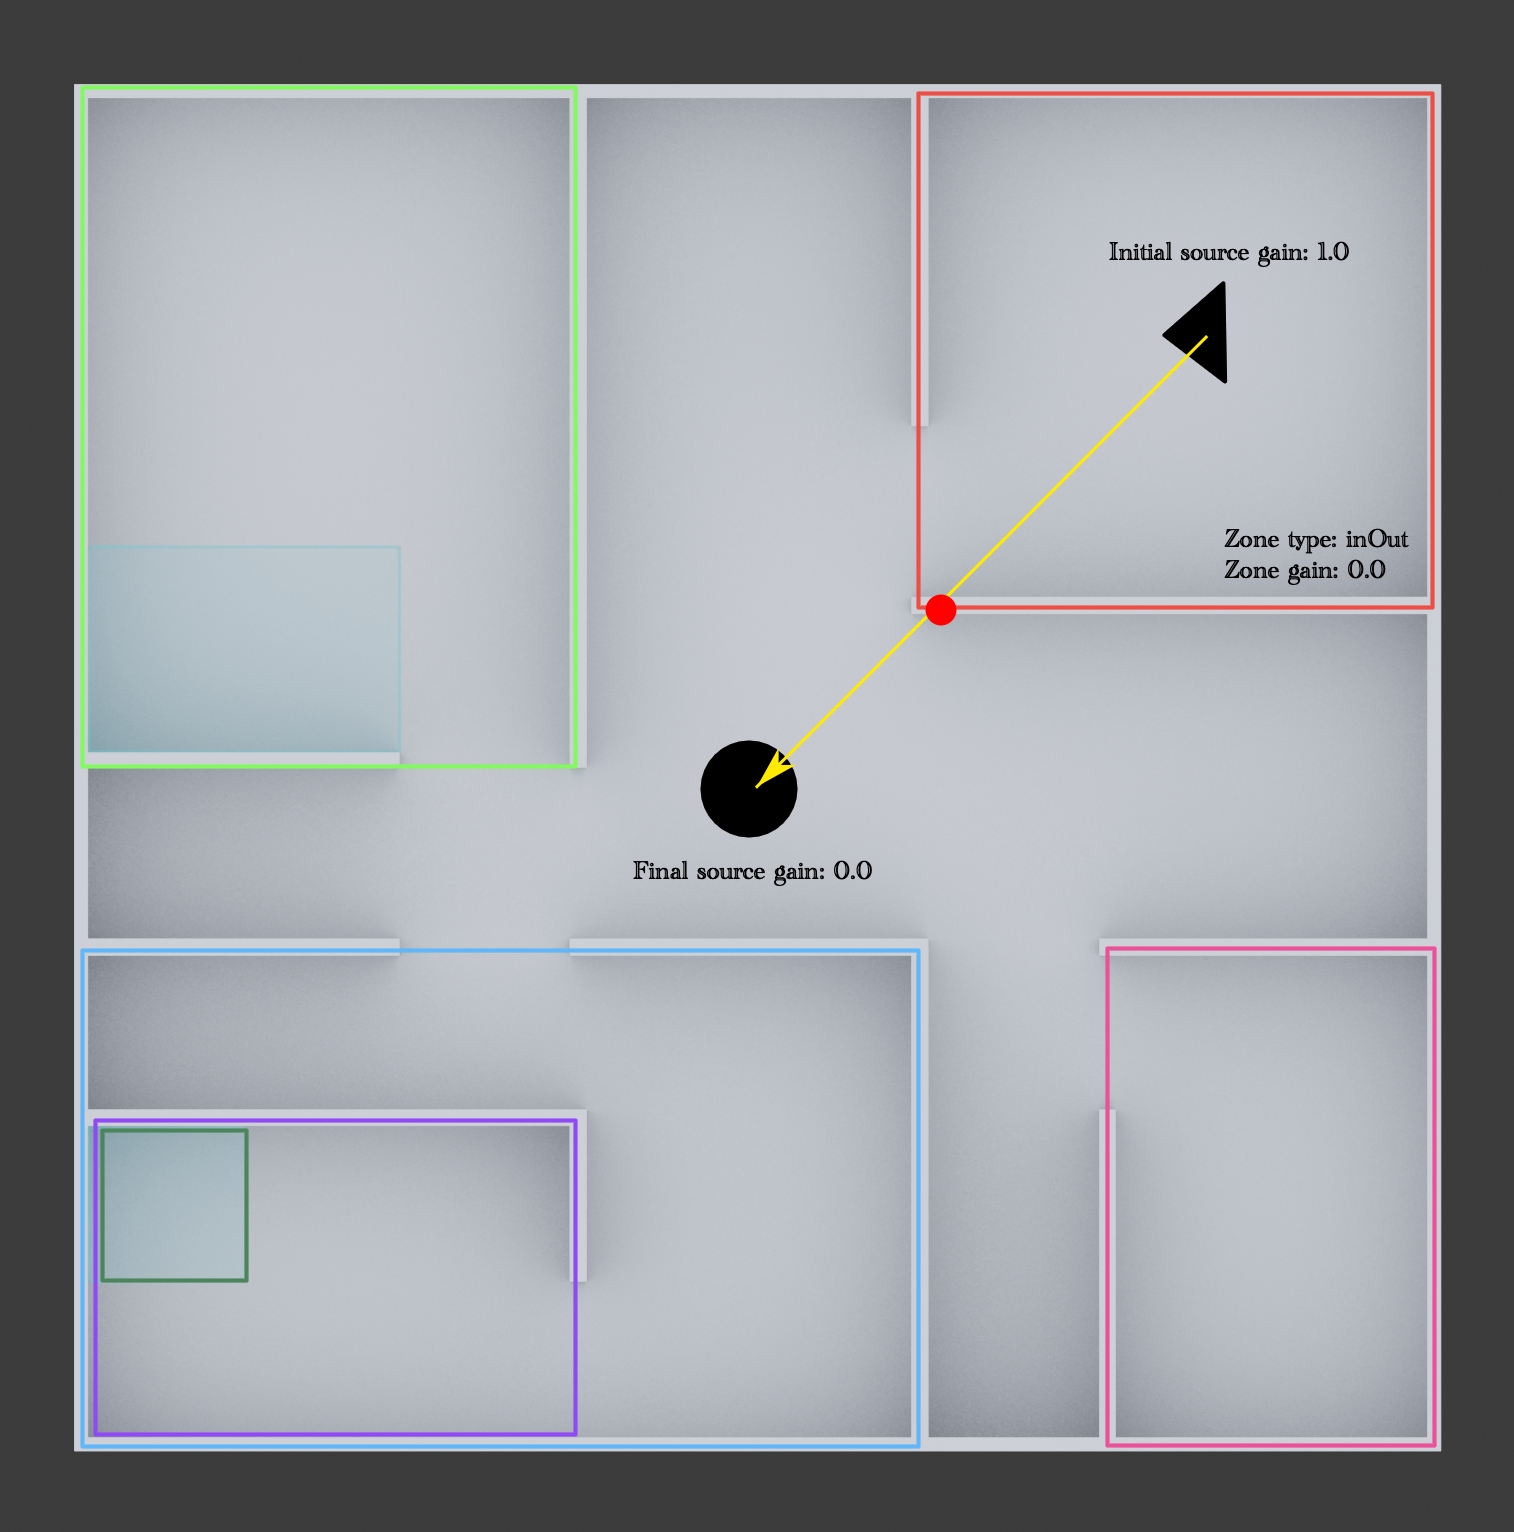
Audio Zones work based on the audio source and the audio listener's positions and they can be of inOut and/or outIn types.
- inOut: The audio zone's parameters will be applied to audio sources inside the audio zone volume when the listener is outside the zone.
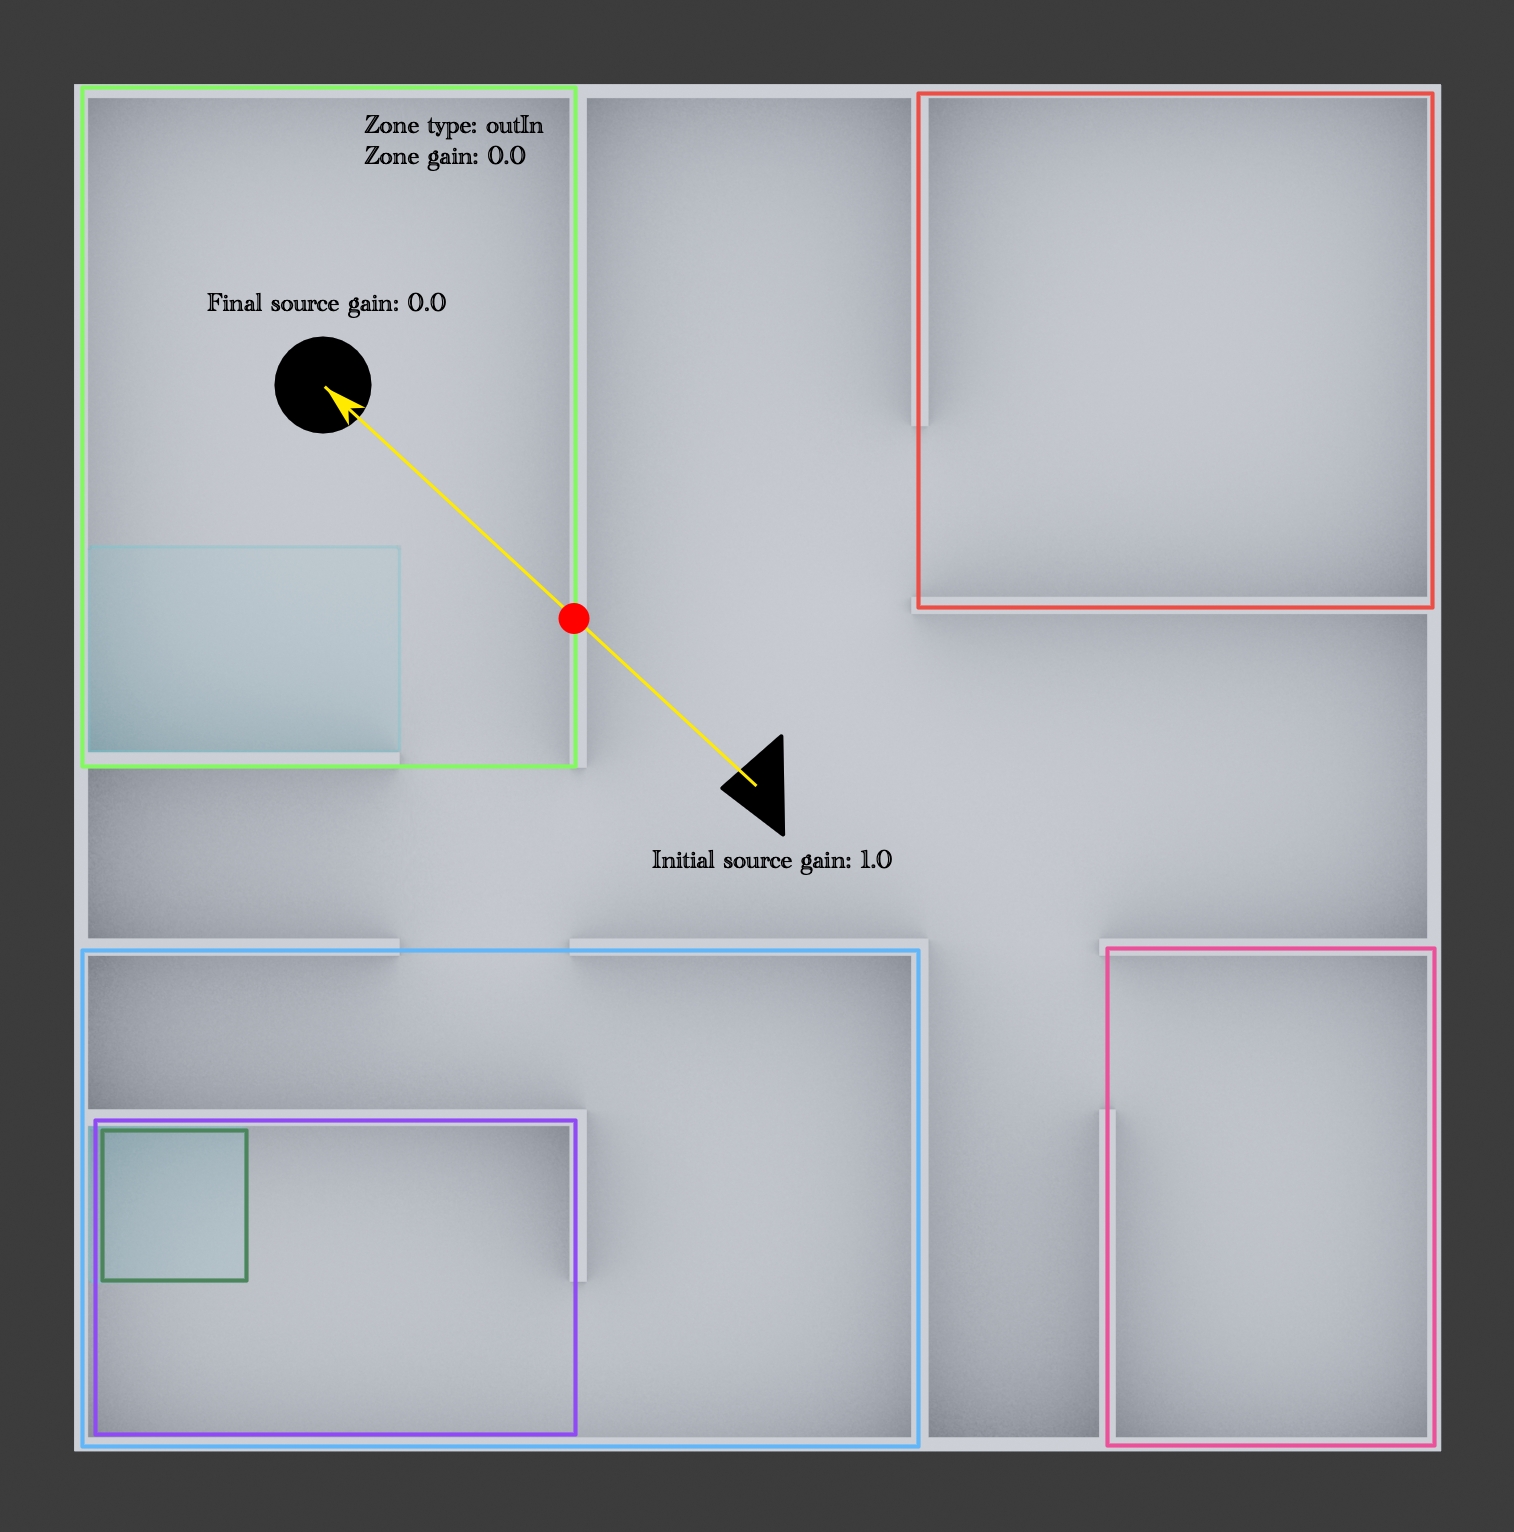
- outIn: The audio zone's parameters will be applied to audio sources outside the audio zone volume when the listener is inside.
Audio zones can be inside other audio zones, in that case the applied parameters will be a reduction of the most restrictive parameters.