Hubs

Hubs

  • Hubs Foundation
  • Docs
  • GitHub
  • Help

›Hubs Admin Panel

Introduction

  • Welcome
  • Getting Started With Hubs
  • Building Scenes with Spoke
  • Creating Custom Avatars
  • Hosting Events in Hubs

Setting Up Your Hub

  • Managing Your Hub's Content
  • Frequently Asked Questions
  • Contact Us

Hubs Fundamentals

  • Create and Join Rooms
  • Hubs Features
  • Sharing Avatar Links Privately
  • User Settings
  • Room Settings
  • Controls
  • Discord Bot
  • Troubleshooting
  • FAQ

Spoke Documentation

  • Create Project
  • User Interface
  • Spoke Controls
  • Adding Content
  • Architecture Kit
  • Grid
  • Skyboxes
  • Lighting and Shadows
  • Physics and Navigation
  • Publish Scenes

For Creators

  • Advanced Avatar Customization
  • Linking Hubs Rooms
  • Using the Blender glTF Exporter
  • Blender Add-on Components
  • Optimizing Scenes
  • Introduction to Behavior Graphs

For Developers

  • System Overview
  • Build a Custom Client
  • Contributing
  • Hubs Query String Parameters
  • GitHub Workflows

Hubs Client development

  • Hubs Client development Basics
  • Core Concepts for Gameplay Code
  • Hubs Client development Interactivity
  • Hubs Client development Networking

Hubs Admin Panel

  • Introduction
  • Getting Started
  • Importing Content
  • Customizing Themes
  • Managing Content
  • Adding Administrators
  • Limiting Access
  • Recipe: Permissive Rooms
  • Recipe: Enable Scene Editor
Edit

Importing Content

The two forms of content you can import into Community Edition are avatars and scenes. Avatars are 3D figures like robots, humans, and ducks that can be worn by visitors to represent themselves, and scenes are 3D environments like interiors and landscapes that provide visual grounding for a room.

You can import any custom content you've created, either on demo.hubsfoundation.org, or using the tools like the Scene Editor available on your hub. For more information about the Scene Editor, see Spoke Documentation[1].

Admin Import Tool

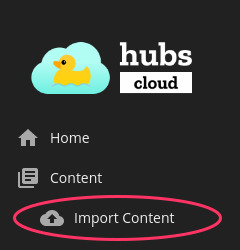
To start importing content, navigate to the "Import Content" tool from the Admin Console. If you don't remember how to get to the Admin Console, see the Getting Started Guide.

Administration Import Content

Once there, you'll need to specify a URL to import:

Administration Import Content URL

Once you've specified the content URL, you will see a preview of the content you're planning to import. You can then choose to exclude or include certain items and set special tags:

Administration Import Content UI

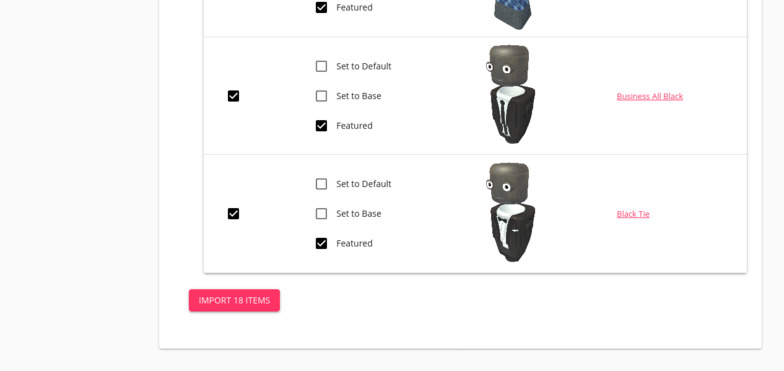
When ready, click the Import button to begin importing your content.

Special tags

You should also set the proper tags for the imported items for your hub to be ready to use:

  • Import at least one Default avatar, which new visitors will have by default.
  • Import at least one Default scene, which new rooms will have by default.
  • Import at least one Base avatar, which can easily be re-skinned by visitors.
  • Optionally Feature one or more items, which will cause those items to be easily discoverable by visitors.

For more information about special tags, see Managing Content.

Updating Imported Content

To refresh content you've imported, simply import it again. If you've previously imported the same content, the existing avatar or scene in your hub will be updated in-place with the newest version of the imported content.


  1. 'Spoke' is the Hubs Foundation trademarked name used for the Scene Editor on demo.hubsfoundation.org. ↩

← Getting StartedCustomizing Themes →
  • Admin Import Tool
  • Special tags
  • Updating Imported Content
Hubs
Docs
IntroductionSetting Up Your HubHubs FundamentalsSpoke DocumentationFor CreatorsFor DevelopersAdministration
Community
Discord Chat
More
HubsSpokeGitHub
Copyright © 2024–2025 Hubs Foundation. Hubs Documentation available under the Creative Commons Attribution-ShareAlike 3.0 Unported (CC BY-SA 3.0) license.